Tuesday, March 5, 2013

Using iCloud to restore app downloads

Thanks to iCloud you can now access every single app you have downloaded, whether free or paid-for, with ease and without the need to pay for it again.

STEP 1
Open the App Store application and tap the Purchased link in the bottom menu bar.

STEP 2
You can now access all your app downloads since you set up your Apple ID.

STEP 3
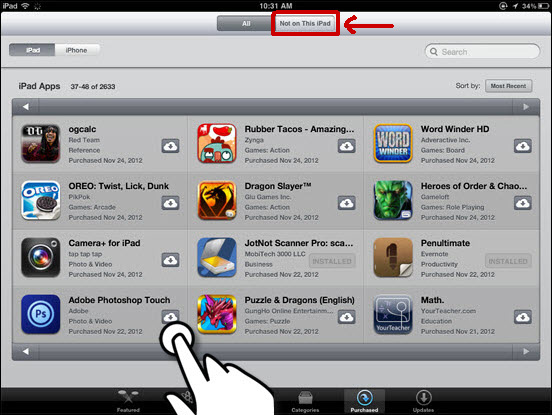
From this screen, tap the "Not On This iPad" link at the top of the page to access iCloud and the downloads contained within.

STEP 4
Having selected the app you wish to download simply click the iCloud icon beside the app and it will instantly start to install.

Monday, March 4, 2013

Customising iCloud

iCloud is a huge leap both in terms of data storage and how you manage the content on your iDevice. iCloud links to a large array of iPad applications and although all of these links will prove exceptionally useful you may want to only use the applications that will directly benefit. For this guide we will take you through each stage of optimising your iCloud usage.

STEP 1
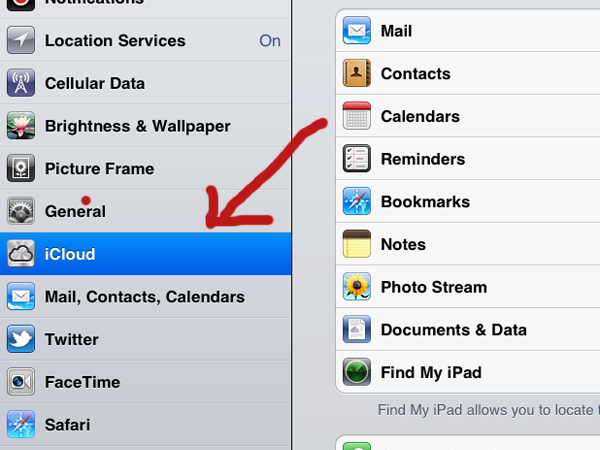
From the home screen select the Settings option and scroll down to iCloud link and tap it.

STEP 2
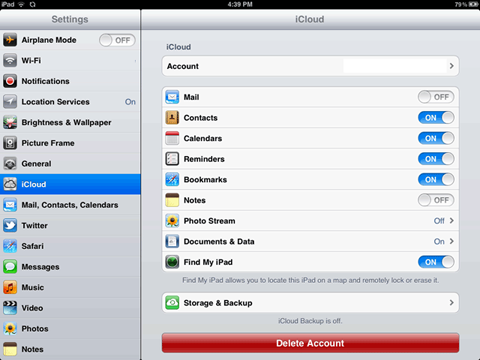
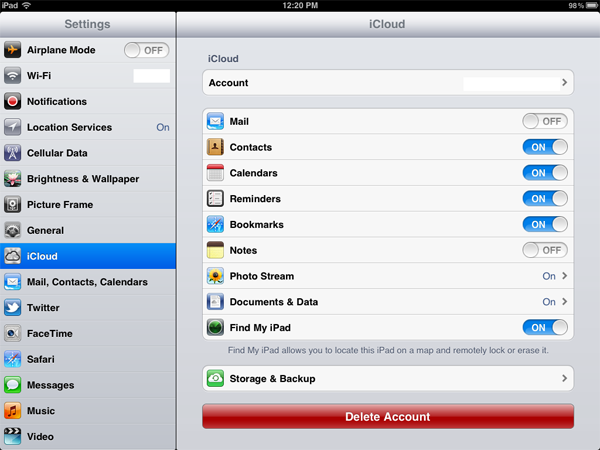
On this page you can choose which content you wish to share over Cloud. Mail, Contacts, Calendars, Reminders, Safari Bookmarks and Notes are rather straightforward. By checking the slider to the "On" position, all new content to sent to or generated by these apps will be automatically uploaded to iCloud during sync.

STEP 3
The Photo stream option is a little different as all images taken or downloaded via your iDevice will be uploaded to the iCloud as usual but these images will be also be shared over all other iCloud linked devices on your network. This may cause problems due to the size of your images and the memory capacity of your other devices.

STEP 4
By choosing to share through the Documents & Data option all documents generated via your device or a host of applications will be uploaded to iCloud. This is very useful but we suggest you maintain a close eye on your iCloud data storage levels. From this link you can also choose to upload data via mobile data transfer. We advise you to checkyour data package with the network provider before selecting this link.

STEP 5
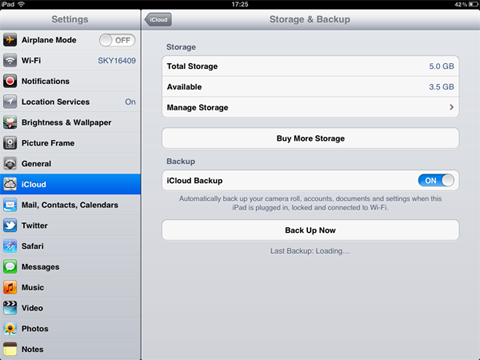
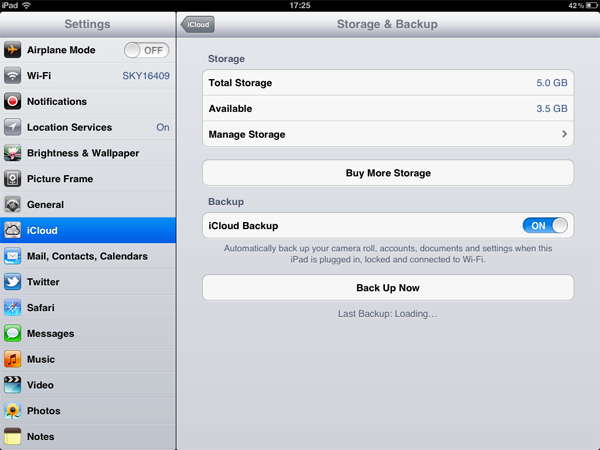
The Storage & Backup link at the bottom of this page offers you access to your iCloud account to purchase more storage space and check current volume levels.

STEP 6
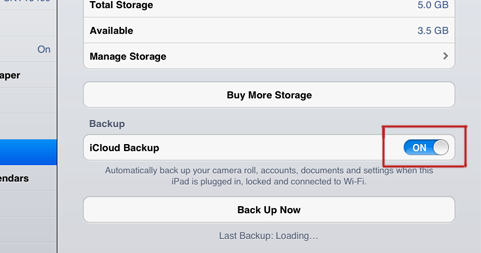
Also on this screen you can choose to use the iCloud Backup option which enables you to sync directly with iCloud without needing to connect your iDevice to the charger. By selecting this option you can automatically back ups all new data in real time when the device is connected to your Wi-Fi network.

Sunday, March 3, 2013

Your Guide to iCloud

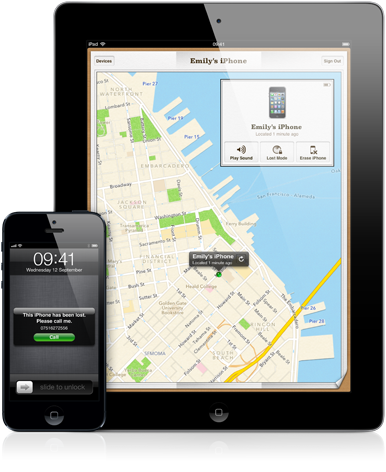
iCloud has changed the way we store everything on our Apple devices. From photographs, music and videos to simple notes, if it's important then it can be saved to you’re your iDevice and your iCloud account. Now if the worst was to happen and you lose your iPad your data is safe and can be easily and securely restored within moments.

Signing up for iCloud - step-by-step

Linking your iDevice to iCloud is extremely easy. Having initially set up your device via iTunes, or via your Wi-Fi connection using the PC Free set-up option, you will have reached the iCloud link screen. If you linked to iCloud at this point during set up please skip to "Customising iCloud" feature below. If you didn't then carry on and we will take you though this process from start to end.

STEP 1
From the Settings app on your home screen, scroll down the options until you find the iCloud link, then tap it to move on.

STEP 2
On this screen you will have to enter your Apple ID details, or if you are a first time user you can sign up for an account via the "Get A Free Apple ID" link at the bottom of the screen.


STEP 3
Once you have completed the registration and/or signed in, you will receive the following request asking you if want to merge your account with iCloud. Assuming you want to go ahead, click the "Merge" link.

STEP 4
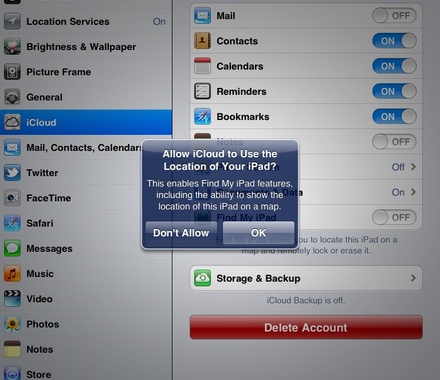
You will now receive a second request.This simply asks to confirm the use of your locational service on your device. Make your selection to proceed. A positive reply is not necessary but is suggested.


STEP 5
From this page you can choose which file types and apps you wish to link to your iCloud account. Do bear in mind that there is a five gigabyte size limit placed upon your account. Additional space is available for an extra cost.


STEP 6
Scroll down to the bottom of the page and click the Storage and Backup link. Here you can check your storage volumes and choose to activate the iCloud Backup option. This way any time you plug your iPad in to charge, as long as it is connected to a Wi-Fi account it will automatically back up any new content to your iCloud account; it doesn't even need to be activated. If you wish to use this extremely useful ability slide the switch to the on position and agree to bypass iTunes back-up. You are now connected to iCloud.